Blog

  • How to Replace Plug on an Extension Cord: DIY Solution

    How to Replace Plug on an Extension Cord: DIY Solution

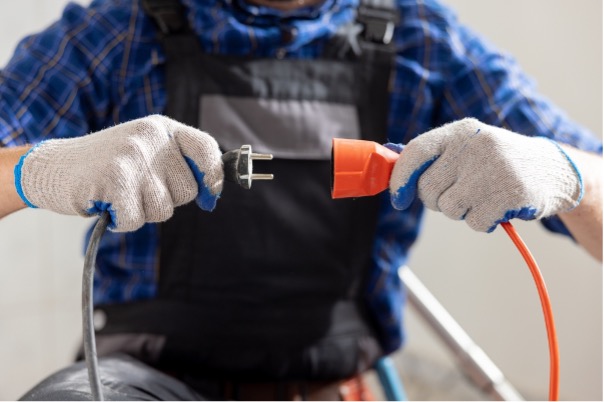
    Replacing extension cord plug components and mastering extension cord repair techniques are key to ensuring a secure home environment. Over time, extension cords may incur damage due to dragging, vehicular runovers, or misuse, posing potential hazards. Promptly addressing these issues by correcting wiring faults or replacing a damaged plug is a vital DIY safety measure that not only mitigates electrical risks but also prolongs the lifespan of your extension cords, making it an indispensable skill for home maintenance.

    This article is your go-to DIY guide on how to replace extension cord plug elements, complete with a detailed overview of the necessary tools, a step-by-step breakdown for removing the old plug, and the methodical procedures for an extension cord plug replacement. Adhering to these instructions will ensure that your extension cords remain safely operational, upholding both their functionality and alignment with home insurance policy standards.

    Assessing the Need for Replacement

    Determining the need to replace a plug on an extension cord is a critical aspect of upholding safety and efficiency in your household. Before embarking on the replacement process, it’s imperative to recognize the signs that signify a plug or cord is ready for an update. Here are some pivotal considerations to guide you:

    • Check for Physical Damage: Inspect the cord for any visible signs of wear and tear. Look for:
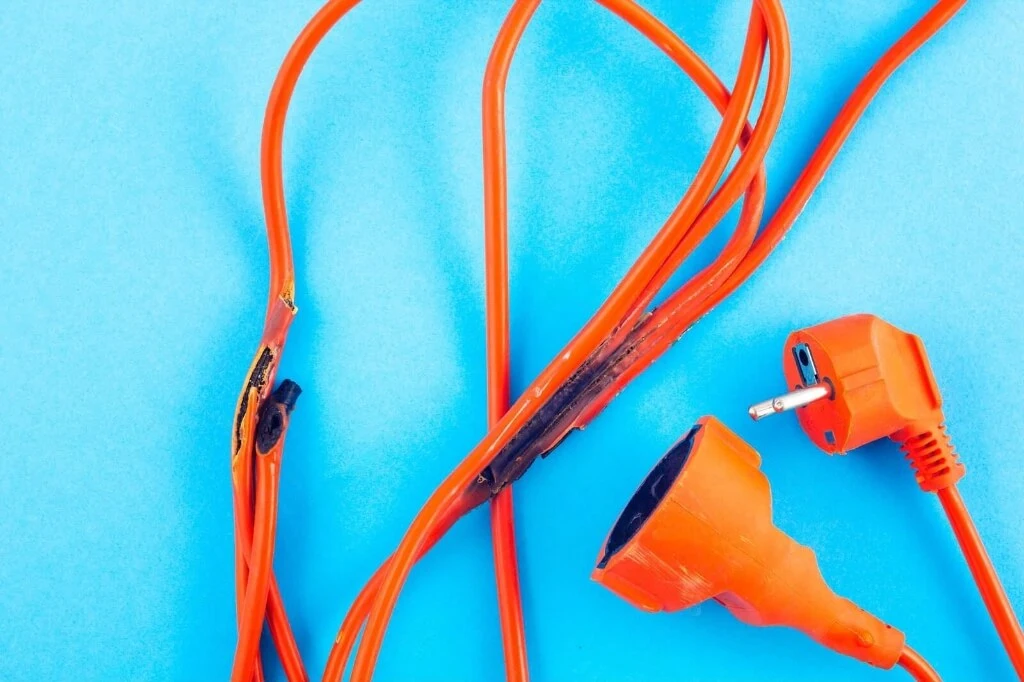
      • Frayed or damaged wires.
      • Be vigilant for exposed conductors resulting from cut insulation, which could precipitate short circuits, fires, or electric shocks. Understanding the extension cord wire diagram, especially a 3 prong extension cord wiring diagram, can be instrumental in preventing such electrical mishaps.
      • Deterioration of the cord insulation, exposing live wires.
      • Be wary of any physical damage such as nailing or stapling cords to walls, as this can compromise the integrity of the cord and create a fire hazard. In such cases, extension cord end replacement or seeking out quality replacement extension cord ends becomes necessary.
    • Assess Functional Issues:
      • If the extension cord is overheating, it could indicate overuse or damage.
      • Loose plugs that don’t fit securely in the outlet may lead to short circuits, heightening the risks of electric shock or fire. It’s crucial to consult an extension cord wiring diagram or learn the proper technique for wiring extension cord plug to address these issues effectively.
      • A detached ground prong from the plug increases the risk of electric shock.
      • Employ a circuit tester to inspect for compromised outlets or power cords. An outlet that overheats under load or emits a fishy odor is an indicator of a serious electrical issue, and it may be time to consider cord plug replacement or to learn how to rewire a plug to ensure your home’s safety.
    • Safety and Compatibility:
      • Ensure the cord is UL certified to guarantee safety and appropriate wire count.
      • Verify that the cord’s electrical rating matches the appliance it’s powering.
      • Modern safety features, such as polarized blades and a comprehensive plug face that covers the outlet’s slots, are essential when wiring an extension cord. The absence of these features often signals the necessity for wiring a new extension cord.
      • To ensure proper use and avoid hazards, refrain from running cords under carpets or through doorways, as this can compromise the cord’s integrity and pose safety risks. Learning how to wire an extension cord correctly is crucial to prevent such dangers.

    Should you encounter any of the aforementioned issues, it’s a clear sign that it’s time to consider extension cord plug wiring or even replacing the entire cord to avert potential risks. Always ensure safety by selecting the appropriate type and rating for extension plug wiring that matches the cord in need of repair.
    Gathering Necessary Tools and Materials
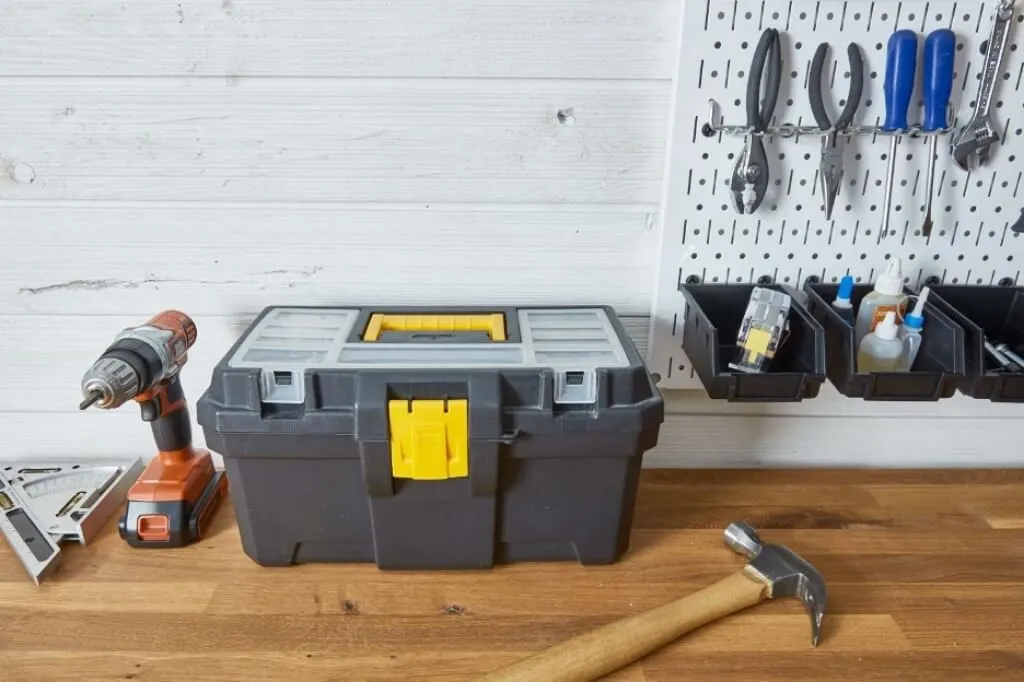
    Commencing the task of plug replacement on an extension cord requires assembling the right tools and materials for a secure and efficient job. Below is a detailed checklist of the essentials for wiring a plug end:

    • Tools Required:
      • Wire Cutters are indispensable for severing the old plug and adjusting the wires to the ideal length, an important step in the process to wire extension cord effectively.
      • A Utility Knife is a must-have for any electrician, proving invaluable for carefully slicing away the extension cord’s outer insulation without harming the internal power tools.
      • Wire Strippers play a pivotal role in receptacle maintenance, stripping away the insulation from individual wires, thus preparing them for secure connection to a new wall outlet plug.
      • A Phillips screwdriver is essential for fastening the ground wire and bare wire to the new plug, ensuring a secure connection during assembly.
    • Materials Needed:
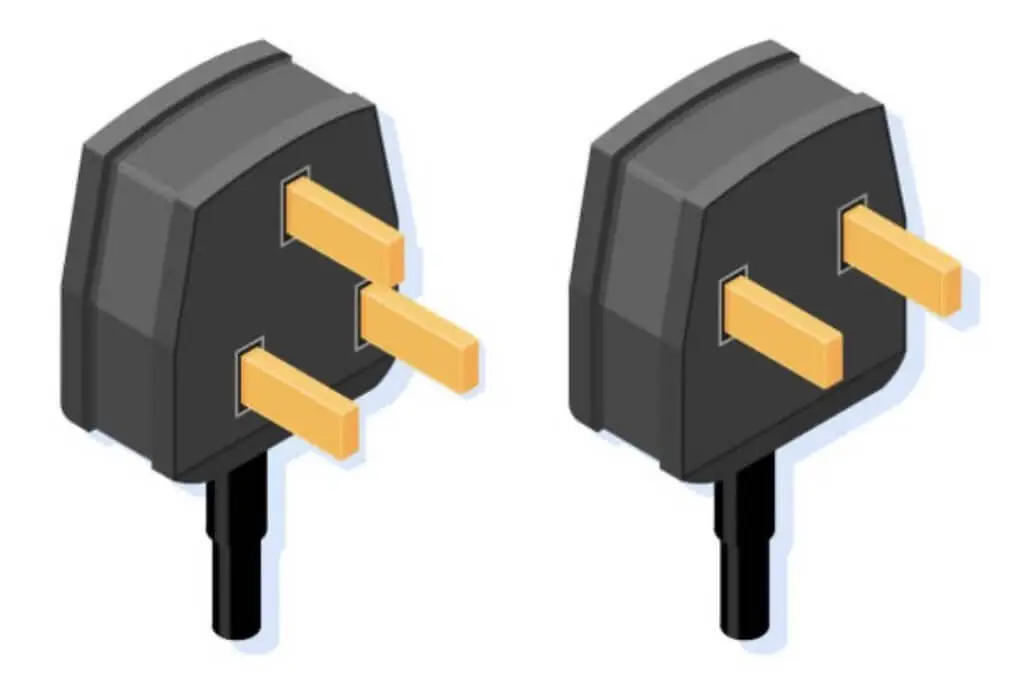
      • When choosing a replacement plug, it’s important to select one that corresponds with your extension cord’s type—be it a 2-prong or a 3-prong—and gauge. Look for a female plug that specifies compatibility with your cord’s specifications on its packaging.
      • Although not mandatory for the plug replacement, employing a plug-in circuit tester can be advantageous for verifying the functionality of your extension cord plug after the cord replacement process.

    Additional Tips:

    • Selecting the appropriate replacement plug is vital; confirm the type and ratings to ensure they match your extension cord, which is key to avoiding safety risks and guaranteeing the wire functions correctly.
    • During the installation of the new plug, ensure that the wire is wrapped clockwise around the screws to establish a secure and correct connection.

    Equipping yourself with the necessary tools and materials beforehand empowers you to tackle the task of wire replacement on an extension cord with confidence and preparedness.

    Need a high-quality replacement plug for your extension cord? Explore our weatherproof extension cord and find the perfect match for your needs.

    Removing the Old Plug
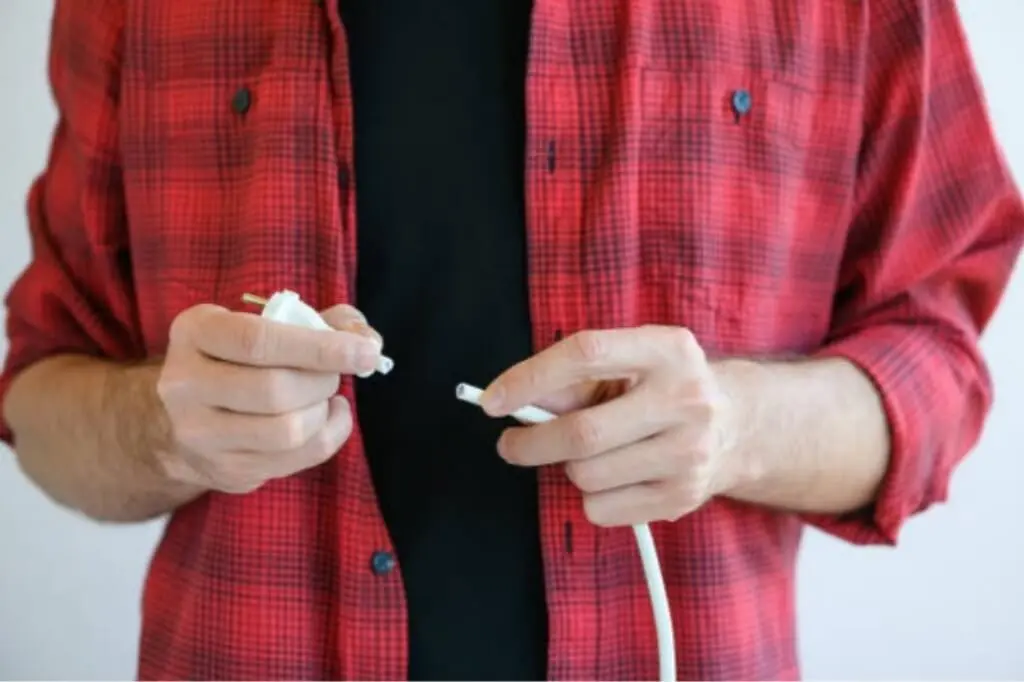
    Safety is paramount before commencing any repair; make sure the extension cord is disconnected to eliminate the danger of electric shock. With the wire safely disconnected, you can then proceed with the steps to remove the old plug.

    1. Identify and Cut Off the Damaged Portion:
      • Locate the damaged part of the cord, including the old plug.
      • Employing wire cutters, meticulously trim away the old plug and any frayed sections of the wire. This crucial step guarantees the removal of any compromised areas that might present a safety risk.
    2. Separating the Plug Components:
      • Should the old plug be designed to disassemble, wield a small screwdriver to deftly separate the components of the plug, ensuring the wire remains intact.
      • Carefully insert the screwdriver between the plug’s halves and wiggle it gently. This technique will aid in prying the plug apart without inflicting harm on the wire or the rest of the cord.
    3. Final Removal:
      • Whether the plug is a pop-open type or a sealed unit, make certain that the entire damaged segment, along with the old plug, is thoroughly detached from the wire of the extension cord.
      • This examination may uncover additional damage along the wire not initially evident. If further compromised wire is detected, it may be imperative to trim the cord more to eliminate all defective wiring.

    By diligently executing these steps, you’ll effectively remove the old plug and any impaired section of the wire, setting the stage for a new plug to be affixed. This meticulous approach not only heightens the safety of the DIY endeavor but also promotes the durability and effectiveness of the extension cord after the repair. It’s essential to proceed without haste and prioritize safety by handling an unplugged wire at all times.

    Preparing the Cord and Installing the New Plug

    With the old plug successfully removed, it’s now time to ready the wire for the new plug. Adhere to the subsequent steps with care to ensure a secure and effective plug replacement:

    Preparing the Cord

    1. Slide the New Plug Over the Cord: Before initiating any alterations, ensure to thread the new plug onto the wire of the cord. This step is essential to circumvent the need for re-stripping and re-cutting, should you overlook this detail later.
    2. Cutting and Stripping:
      • Cut the Outer Jacket: Approach the task with precision, carefully slicing around the cord’s outer jacket to avoid impairing the wire’s insulation. A utility knife is the ideal tool for this meticulous job.
      • Split and Trim the Jacket: Employ your fingers to gently separate the jacket at the incision and pare away any surplus material. This action will reveal the wire’s insulated core for further handling.
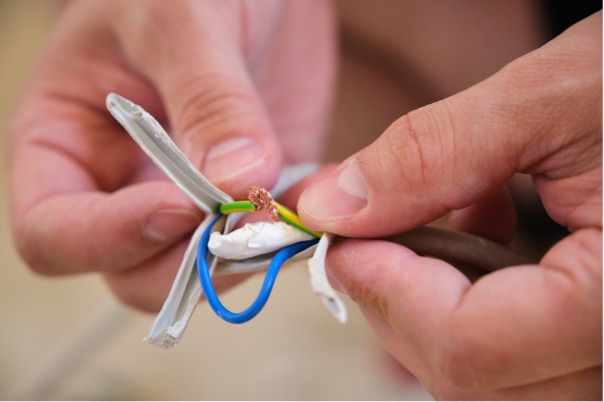
      • Strip the Wires: Utilize wire strippers to meticulously remove about 3/4 inch of insulation from the extremity of each wire, which typically includes black, white, and green colors, exposing the conductive material.

    Wiring the New Plug

    1. Tie an Underwriter’s KnotWhile not mandatory, it’s advisable to form an underwriter’s knot with the white (neutral) and black (hot) wires inside the plug for enhanced protection. This technique helps to alleviate strain on the wire’s internal connections.
    2. Connect the Wires to Their Respective Terminals:
      • Black (Hot) Wire: Connect to the brass terminal.
      • White (Neutral) Wire: Connect to the silver terminal.
      • Green (Ground) Wire: Connect to the green ground screw.
      • When attaching the wires, ensure they coil in a clockwise direction around the screws. This orientation promotes a more secure connection as the screws are fastened, preventing slippage of the wire.

    Securing the Plug and Final Checks

    1. Tighten the Plug ClampAfter establishing the correct connections, firmly secure the plug clamp onto the cord. This pivotal step is integral to prevent any potential dislodging of the wire.
    2. Reassemble the PlugIf the plug comes in two parts, slide the outer shell up to the wire-connected portion and join the two parts with the provided screws. Ensure the wire is properly secured and the plug body is aligned correctly.
    3. Double-Check ConnectionsBefore powering up, double-check that all wire connections are secure and that each wire is fastened to the correct terminal. Tighten any loose screws and verify that the plug is properly sealed.

    By meticulously following these steps, you can prepare the extension cord for a comprehensive safety check and testing, confirming that the wire connections are safely operational. This routine not only preserves the functionality of your extension cords but also safeguards against potential electrical hazards.

    Safety Checks and Testing

    After fitting a new plug to an extension cord, it’s vital to conduct detailed safety checks and wire testing to ensure the cord’s optimal safety and functionality. Adhere to these structured steps to finalize the installation process:

    Safety Checks

    1. Visual Inspection:
      • Inspect the extension cord for any visible damage such as frayed wires, burn marks, or loose wire connections that could compromise safety.
      • Verify that the cord’s grounding pin is intact, as this wire component is essential for preventing electrical hazards and ensuring user safety.
    2. Proper Wiring Verification:
      • Employ an outlet tester to validate the correct wire configuration, including checks for open grounds, open neutrals, and reversed hot and neutral wires to ensure electrical safety.
      • Utilizing a multimeter to test for continuity, voltage, and grounding is crucial in verifying the electrical integrity of the wire, ensuring the cord functions properly.

    Testing Procedures

    1. Initial Power Test:
      • Plug the cord into a known good outlet to verify it’s receiving power.
      • To assess functionality, connect a test lamp or a small appliance to the wire’s outlet end and observe its operation.
    2. Flexibility and Connection Test:
      • While the test lamp or appliance is operational, gently flex the wire at each end and keep an eye out for any flickering or interruptions in power, which may signal a connection issue.
    3. Advanced Testing (Optional):
      • For a more thorough examination, employ a non-contact voltage sensor along the wire from the source to the output, which is effective in pinpointing breaks in the hot lead.
      • If problems persist with the wire, it may be necessary to cut the cord to install a new plug or socket on the intact half, or for professional-grade cords, use specialized equipment like a Time Domain Reflectometer (TDR).

    Post-Testing Safety Measures

    • Once testing is complete, make sure the wire is safely disconnected from any power source before proceeding with any adjustments.
    • Recheck all wire connections for tightness and confirm that any replacement plug matches the original cord’s amperage and voltage ratings to ensure compatibility and safety.
    • Use a lighted extension cord for easy power indication during future uses.

    By adhering to these safety checks and testing procedures, users can confidently ensure their wire-encased extension cords are safe and operational. This not only protects the devices connected to the cords but also safeguards the users from potential electrical hazards.

    Conclusion

    Throughout this article, we’ve emphasized the critical importance of maintaining the safety and efficiency of your home by regularly checking and, when necessary, replacing the plugs on your wire-embedded extension cords. Through detailed guidance, we’ve navigated the process of identifying a worn or damaged plug, gathering the requisite tools and materials, and meticulously executing the removal and installation of a new plug. Our journey underscores not only the practical steps involved but also the paramount importance of adhering to safety precautions at every turn to prevent potential hazards.

    As we conclude, the final measure of our efforts comes through rigorous testing to ensure the wire within the cord functions safely and correctly. This essential step bridges our work from procedure to practice, providing peace of mind that the diligent work performed significantly contributes to a safer home environment. Let this article serve as a comprehensive guide not only for a single repair but also as a foundation for maintaining the overarching safety and functionality of all the electrical tools and appliances in your care.

    Ready to ensure your extension cords are up to the task with a solution designed for longevity and reliability? Discover the only product you’ll need for secure, efficient power management. Get your durable, weatherproof extension cord now.
  • What Gauge Extension Cord Do You Need?

    What Gauge Extension Cord Do You Need?

    Extension cords are incredibly versatile tools that enable us to bring electricity to places where it might not be readily available. They can come in handy for a variety of purposes, such as setting up a new workstation in your garage, landscaping your garden, or simply plugging in holiday lights. However, not all extension cords are created equal, and one crucial factor to consider is the cord’s gauge. But what does “gauge” mean in the context of extension cords and how do you choose the right one for your needs? Let’s explore this electrical mystery together and make sure you pick the right cord for your specific requirements.

    What Does “Gauge” Mean?

    In extension cords, the term “gauge” refers to the thickness or diameter of the wire inside the cord. It is typically expressed as a number, with lower numbers indicating thicker wires. Wire gauge is a vital factor because it directly affects the cord’s capacity to carry electrical current safely.

    Different Gauges and Their Uses

    Extension cords come in various gauges; each gauge serves a specific purpose. Here’s a breakdown of the most common extension cord gauges and their typical uses:

    1. 10 Gauge (AWG 10)

    • Heavy-Duty Appliances: 10-gauge extension cords are the thickest and can handle the most current. They suit heavy-duty appliances like air compressors, large power tools, and electric vehicle chargers.
    • Long-Distance Power: If you need to extend power over a considerable distance, a 10-gauge cord is your best bet to avoid voltage drop and ensure safe operation.

    2. 12 Gauge (AWG 12)

    • Medium-Duty Tools: 12-gauge extension cords are versatile and can handle various tools and devices. They suit lawnmowers, drills, saws, and most household appliances.
    • General Outdoor Use: These cords work well for outdoor activities such as yard work, gardening, or holiday lighting.

    3. 14 Gauge (AWG 14)

    • Light to Medium-Duty Tools: 14-gauge cords are best suited for lighter tools and devices like leaf blowers, string trimmers, and smaller power tools.
    • Indoor Use: They are perfect for indoor applications such as connecting lamps, computers, and home electronics.

    4. 16 Gauge (AWG 16)

    • Light Duty: 16-gauge cords are the thinnest and can handle the least current. They are suitable for small, low-power devices like phone chargers, radios, and fans.
    • Limited Distance: Due to their thinner wires, 16-gauge cords should not be used for long distances or high-power applications.

    How to Determine the Right Gauge

    Selecting the right extension cord gauge is crucial to ensure safety and efficient power delivery. Here’s a step-by-step guide to help you make an informed decision:

    1. Identify Your Appliance or Tool’s Power Requirements

    Before you can choose the right gauge, you need to know how much power your appliance or tool requires. Check the manufacturer’s label or user manual for information on voltage (V) amperage (A) and power factor (p.f). These specifications will help you determine the wattage (W) using the formula: W = V x A x p.f.

    2. Consider the Cord Length

    The longer the extension cord, the more significant the voltage drop can be, especially with thinner gauges. To minimize voltage drop, choose a thicker gauge if you need a longer cord. Consider the following approximate cord length limits for common gauges:

    • 10 Gauge: Up to 100 feet
    • 12 Gauge: Up to 50 feet
    • 14 Gauge: Up to 25 feet
    • 16 Gauge: Up to 10 feet

    3. Match the Gauge to Your Requirements

    Now that you know your appliance’s power requirements and the cord length needed, you can select the appropriate gauge. Here’s a quick reference:

    • For heavy-duty appliances and long-distance use, choose a 10-gauge cord.
    • For medium-duty tools and general outdoor use, opt for a 12-gauge cord.
    • Light to medium-duty tools and indoor applications are well-suited for 14-gauge cords.
    • For small, low-power devices and short distances, a 16-gauge cord will suffice.

    The Risks of Using the Wrong Gauge

    Selecting the wrong gauge extension cord can lead to various risks, including:

    1. Overheating

    Using a cord with a gauge that is too small for your device can cause overheating. When the cord cannot handle the current required, it becomes a bottleneck for electricity flow, leading to excessive heat generation. This heat can melt insulation, damage the cord, or even start a fire.

    2. Voltage Drop

    Thinner gauge cords are more susceptible to voltage drop, especially over longer distances. Voltage drop can result in reduced appliance performance and, in some cases, damage to sensitive electronics. For example, your power tools may not run as efficiently, or your computer may experience sudden shutdowns.

    3. Fire Hazard

    Perhaps the most severe risk of using the wrong gauge extension cord is the potential for a fire hazard. Overloaded or overheated cords can ignite nearby combustible materials, leading to a dangerous and potentially life-threatening situation.

    4. Reduced Lifespan

    Using an undersized extension cord for high-power appliances can significantly reduce its lifespan. The cord’s wires and insulation may degrade more quickly, leading to frequent replacements and added expenses.

    In Conclusion

    Choosing the right extension cord gauge is essential for the safe and efficient operation of your appliances and tools. Understanding the power requirements of your devices, considering the cord length, and matching the appropriate gauge will help you make an informed decision. Remember that using the wrong gauge can lead to overheating, voltage drops, fire hazards, and premature cord failure.

    By following these guidelines, you can ensure that your extension cord serves you well and keeps your electrical connections secure. So, the next time you embark on a DIY project or need to power your favorite outdoor gadgets, you’ll be armed with the knowledge to make the right choice. Stay safe, and enjoy your powered-up adventures!

  • How To Protect Outdoor Extension Cord From Rain: Practical Tips and Solutions

    How To Protect Outdoor Extension Cord From Rain: Practical Tips and Solutions

    Extension cords play a vital role when it comes to outdoor activities like hosting events, yard work, or adding a touch of festive charm to your home. These long power cords enable us to connect our electrical devices to distant power sources. However, when the rain clouds gather, our extension cords become vulnerable to water damage, posing serious safety hazards. This guide’ll explore the risks associated with wet extension cords and provide practical tips and solutions for protecting your outdoor extension cord from rain.

    The Risks of Wet Outdoor Extension Cord

    Before we delve into protective measures, it’s essential to understand the risks associated with using wet extension cords. When an extension cord is exposed to rain or moisture, several dangers can arise:

    1. Electrical Shock

    Water and electricity don’t mix well. When a wet extension cord comes into contact with water, it becomes a conductor of electricity. Anyone who touches a wet cord or stands on a wet surface near it is at risk of receiving a painful and potentially dangerous electrical shock.

    2. Short Circuits and Fires

    Moisture can penetrate the cord’s insulation and reach the electrical conductors inside. This can lead to short circuits and even fires, which can damage your property or cause injuries.

    3. Cord Damage

    Wet cords can quickly deteriorate, leading to frayed or damaged wires. This not only reduces the lifespan of your extension cord but also makes it unreliable and unsafe to use.

    Now that we understand the potential risks let’s explore various methods and products to keep your extension cords dry and safe.

    Protecting Your Extension Cord from Rain: Solutions and Tips

    1. Use a Weatherproof Extension Cords

    When you know you’ll frequently be using extension cords outdoors, investing in weatherproof extension cords is a smart choice. These cords are designed with weather-resistant materials and have features like reinforced insulation and sealed plugs.  

    When purchasing a weatherproof extension cord, look for the following features:

    • Water-resistant plugs: Ensure the plug ends of the cord are equipped with rubber or plastic covers to keep out moisture.
    • Heavy-duty insulation: Choose cords with thick, durable insulation that provides extra protection against the elements.
    • UV resistance: UV-resistant cords are ideal for long-term outdoor use as they won’t deteriorate under the sun’s rays.

    While weatherproof extension cords may be more expensive than standard ones, they offer long-lasting protection and are well worth the investment.  There’s no better combination of all of these protective features than our brilliantly designed Weatherproof Extension Cord.

    2. Use a Waterproof Extension Cord Cover

    One of the most effective ways to protect your outdoor extension cord from rain is by using a waterproof extension cord cover. These covers are designed to encase your entire cord connection, shielding it from the elements. Here’s how to use them:

    Step 1: Choose a waterproof extension cord cover that matches the size of your cord and plug.

    Step 2: Place the cover over the extension cord connection, ensuring it’s completely sealed.

    Step 3: Secure the cover in place using the provided locking mechanism or a zip tie.

    Waterproof extension cord covers are readily available at hardware stores and online retailers, making them a convenient and affordable solution for rainy conditions.

    3. Elevate Your Extension Cord

    Another effective way to protect your extension cord from rain is to keep it elevated above the ground. Here’s how to do it:

    Step 1: Identify suitable anchor points, such as tree branches, fences, or outdoor hooks, to elevate your cord.

    Step 2: Use cord hooks or clips to secure the cord at both ends, ensuring it stays above the ground.

    Step 3: Create a gentle slope in the cord to allow rainwater to run off rather than pooling in low spots.

    Elevating your extension cord not only keeps it dry but also prevents it from lying in puddles or becoming entangled in wet grass.

    4. Employ a DIY Rain Shelter

    If you’re looking for a cost-effective solution, consider creating a DIY rain shelter for your extension cord. Here’s how to make one:

    Step 1: Gather materials such as PVC pipes, plastic sheets, and duct tape.

    Step 2: Create a frame using the PVC pipes and secure it firmly in the ground or to a nearby structure.

    Step 3: Drape the plastic sheet over the frame, leaving enough space for your extension cord to pass through.

    Step 4: Seal the edges of the plastic sheet with duct tape to prevent rain from seeping in.

    This DIY rain shelter will provide excellent protection for your extension cord during wet weather conditions.

    5. Seal Cord Connections

    If you’re using multiple extension cords connected together, it’s crucial to seal these connections to prevent water from infiltrating. Here’s how to do it:

    Step 1: Purchase a pack of outdoor-rated electrical tape or self-sealing silicone tape.

    Step 2: Before connecting the extension cords, wrap the male end (prongs) with the tape, ensuring it forms a tight seal.

    Step 3: After connecting the cords, wrap the entire connection with the tape, extending it a few inches on each side.

    This simple yet effective method will keep your cord connections dry and secure.

    6. Minimize Cord Exposure

    One of the easiest ways to protect your extension cord from rain is to minimize its exposure to water in the first place. Here are some tips to achieve that:

    • Position the cord overhead: Whenever possible, run your extension cord along fences, walls, or elevated surfaces to keep it away from ground-level moisture.
    • Use cord clips: Secure your cord in place with cord clips or holders to prevent it from dragging on wet surfaces.
    • Avoid low spots: If you must lay your cord on the ground temporarily, ensure it doesn’t run through low spots or areas prone to flooding.

    By being mindful of how and where you route your extension cord, you can significantly reduce the risk of water damage.

    Conclusion

    Outdoor extension cord are versatile tools that make our outdoor activities more convenient. However, they can become safety hazards when exposed to rain or moisture. To protect your extension cord from rain, consider using waterproof cord covers, elevating the cord, creating DIY rain shelters, investing in weatherproof extension cords, sealing cord connections, and minimizing cord exposure.

    By following these practical tips and solutions, you can ensure the safety of your outdoor electrical connections, prolong the lifespan of your extension cords, and enjoy worry-free outdoor activities even when the rain comes pouring down. Remember, safety always comes first, so take your time when it comes to electrical equipment in wet conditions.

  • How to Run an Extension Cord from the Generator into the House: A Comprehensive Guide

    How to Run an Extension Cord from the Generator into the House: A Comprehensive Guide

    Power outages can happen unexpectedly, leaving you in the dark without essential appliances. In such situations, a generator can be a lifesaver, providing temporary electricity to keep your home running smoothly. However, you may need to run an extension cord into your house to maximize your generator’s power. This guide will walk you through the process step by step, emphasizing safety precautions, the Run an Extension Cord from the Generator into the house, and potential hazards to avoid.

    Why You Might Need to Run an Extension Cord from the Generator into the House

    Before we delve into the “how-to” part, let’s briefly discuss why you might need to run an extension cord from your generator into your house. Power outages can be caused by severe weather, equipment failure, or other unforeseen circumstances. When the grid goes down, your generator becomes a valuable resource for keeping your lights on, your food cold, and your electronics charged. Running an extension cord allows you to channel this power where you need it most, whether to keep your refrigerator running, power essential medical equipment, or maintain a comfortable living environment.

    Step-by-Step Guide

    Step 1: Assess Your Generator’s Capacity

    The first step in running an extension cord from your generator into your house is determining your generator’s capacity. This is crucial to prevent overloading it, which can damage the generator or pose a fire risk. Check your generator’s user manual or label for its rated wattage capacity. List the essential appliances and devices you want to power during the outage and add up their wattage requirements. Ensure that the total wattage does not exceed your generator’s capacity.

    Step 2: Choose the Right Extension Cord

    Selecting the appropriate extension cord is a critical safety consideration. Not all extension cords are created equal, and using the wrong type can result in overheating and fires. Here’s what you need to know:

    A. Gauge Matters

    Extension cords are available in different gauges, typically ranging from 16 to 10 AWG (American Wire Gauge). The lower the gauge number, the thicker the wire and the higher the capacity. Opt for a lower gauge extension cord for longer distances or higher wattage requirements to minimize voltage drop.

    B. Length Matters Too

    While it might be tempting to use the longest extension cord you have on hand, longer cords can cause a voltage drop, reducing the effectiveness of your generator. Choose the shortest cord to connect your generator to your house safely.

    C. Cord Type

    Use extension cords specifically designed for outdoor use. Look for cords with a durable jacket to protect against moisture and wear. Never use indoor extension cords outside, as they are not built to withstand the elements.

    Step 3: Prepare Your Generator

    Before starting your generator, ensure it’s placed in a well-ventilated area, away from windows, doors, or any openings to your home. This prevents carbon monoxide from entering your living space, which can be fatal. Follow these steps:

    A. Fuel Up

    Ensure your generator has enough fuel to run for the expected duration of the outage. Check the fuel level and add gasoline or propane as needed.

    B. Check the Oil

    Check the oil level in your generator’s engine. Running a generator with insufficient oil can lead to engine damage.

    C. Start the Generator

    Start your generator following the manufacturer’s instructions. Allow it to warm up for a few minutes before connecting any cords.

    Step 4: Connect the Extension Cord

    Now that your generator is running, it’s time to connect the extension cord. Follow these steps carefully:

    A. Turn Off Circuit Breakers

    Before connecting the extension cord to your house, turn off the main circuit breaker in your electrical panel. This will prevent backfeeding, where electricity from your generator flows into the grid and can harm utility workers.

    B. Plug-In Safely

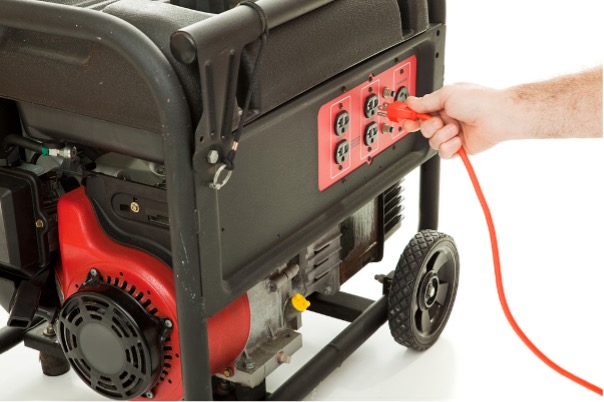
    Plug one end of the extension cord into the generator’s outlet. Make sure it’s secure and snug to prevent accidental disconnection. Then, route the extension cord away from foot traffic and potential hazards.

    C. Connect to Your House

    Locate an outdoor-rated electrical outlet on the exterior of your house. Plug the other end of the extension cord into this outlet. Ensure the connection is weatherproof and that the extension cord is not pinched or damaged.

    Step 5: Power Up

    Now that your generator is connected to your house, it’s time to restore power. Follow these steps:

    A. Reset the Circuit Breaker

    Go to your electrical panel and reset the main circuit breaker to the “On” position.

    B. Prioritize Appliances

    Slowly turn on and plug in essential appliances and devices one at a time. Start with critical items like your refrigerator, freezer, and heating or cooling systems.

    C. Monitor Load

    Keep an eye on your generator’s load. If it’s approaching its rated capacity, consider prioritizing which appliances to power or turning off non-essential devices to avoid overloading the generator.

    Safety Precautions and Hazards to Avoid

    While Run an Extension Cord from the Generator into the house can be a practical solution during a power outage, it also comes with potential hazards. To ensure your safety and the safety of others, take note of these precautions and hazards:

    Safety Precautions

    1. Carbon Monoxide Awareness

    Carbon monoxide (CO) is a colorless, odorless gas generators produce. Ensure your generator is located in a well-ventilated area, far from windows and openings. Consider installing a carbon monoxide detector in your home for added safety.

    2. Regular Maintenance

    Keep your generator in good working condition by performing regular maintenance, such as oil changes and filter replacements. A well-maintained generator is less likely to malfunction during an outage.

    3. Fire Safety

    Place your generator on a non-combustible surface and keep flammable materials away from it. Check extension cords for signs of damage or wear and replace any damaged cords immediately.

    4. Electrical Awareness

    Never overload your generator, as this can damage it and create a fire hazard. Use the right extension cord for your generator’s capacity, and ensure all connections are secure.

    Hazards to Avoid

    1. Backfeeding

    Backfeeding occurs when electricity from your generator flows into the grid, posing a danger to utility workers trying to restore power. Always turn off your home’s main circuit breaker before connecting your generator.

    2. Wet Conditions

    Electrical equipment, including extension cords, can be extremely hazardous in wet conditions. Ensure all connections are weatherproof and your generator and extension cords are dry.

    3. DIY Electrical Work

    If you’re uncomfortable with electrical work, hiring a qualified electrician to set up a transfer switch is best. Attempting DIY electrical connections can lead to serious accidents or damage to your home’s electrical system.

    Conclusion

    Running an extension cord from your generator into your house can be a practical solution during power outages, ensuring you have the essential power you need. However, safety should always be a top priority. By following the steps in this guide, choosing the right extension cord, and being aware of potential hazards, you can use your generator safely and effectively when the lights go out. Remember, knowledge and caution are your best allies regarding electricity. Stay safe, stay powered up, and be prepared for whatever Mother Nature throws your way.

  • How Often Should You Inspect an Extension Cord: A Guide to Electrical Safety

    How Often Should You Inspect an Extension Cord: A Guide to Electrical Safety

    Wondering how often you should check your extension cord? One aspect often overlooked when it comes to ensuring your home’s or workplace’s safety is the humble extension cord.

    These seemingly harmless devices are crucial in powering our appliances and gadgets, but their significance in electrical safety cannot be overstated. Just like we perform routine maintenance on our vehicles and appliances, extension cords also need periodic inspections to prevent accidents and ensure longevity.

    This comprehensive guide will delve into the significance of extension cord safety, provide you with a recommended frequency for inspecting extension cords, highlight common signs of wear and tear to watch out for, and offer valuable tips on proper storage and care.

    By the end of this article, you will be well-equipped with the knowledge needed to safeguard your home or workplace against potential electrical hazards.

    The Significance of Extension Cord Safety

    Before we delve into the specifics of inspection, it is crucial to understand why prioritizing extension cord safety is essential. Extension cords are a common presence in our daily lives, connecting electrical outlets and the appliances we use regularly. Whether you are using them to power a laptop, charge your phone, or operate power tools, they offer a convenient solution to connect to a power source that might be out of reach.

    However, this convenience comes with its own set of risks. Extension cords can become dangerous when not used or maintained properly. The U.S. Consumer Product Safety Commission (CPSC) estimates that around 4,000 injuries associated with extension cords are treated in emergency rooms yearly. These injuries range from electric shocks and burns to fires caused by faulty cords.

    The main reasons behind these accidents are:

    1. Wear and Tear: Extension cords endure significant wear and tear due to frequent bending, pulling, and exposure to various elements. This wear can compromise their insulation, making them more susceptible to electrical faults.
    2. Overloading: Plugging too many devices into a single extension cord or exceeding its load capacity can lead to overheating and, in some cases, fires.
    3. Improper Storage: Tangled cords under rugs or pinned against walls can overheat and pose fire hazards.
    4. Inadequate Inspection: Neglecting to inspect extension cords for damage can result in continued use of no longer safe cords.

    Given these risks, it’s clear that taking extension cord safety lightly is not an option. Regular inspections are a simple yet effective way to mitigate these dangers.

    How Often Should You Inspect Your Extension Cord?

    Now that we understand why extension cord safety is essential let’s discuss how often you should inspect your extension cords. The inspection frequency primarily depends on the location and usage of the cord.

    Home Use

    For extension cords used in typical home settings, it is advisable to perform visual inspections every three to six months. This regularity allows you to catch potential issues before they escalate into safety hazards. Additionally, you should inspect extension cords that have been in storage or unused for an extended period before plugging them in.

    Commercial or Industrial Use

    More frequent inspections are necessary in commercial or industrial environments where extension cords may experience more wear and tear due to heavy-duty equipment. A monthly inspection is recommended, with more in-depth checks every three to six months. Consider the higher stakes and increased usage when determining your inspection schedule.

    Construction Sites

    Construction sites are notorious for their demanding electrical requirements. Extension cords in these settings should be inspected weekly due to exposure to harsh conditions. Heavy machinery, dust, and extreme weather can quickly deteriorate extension cords, making regular checks crucial for safety.

    Remember, these are general guidelines, and you should adjust your inspection schedule based on the specific circumstances of your environment and the condition of your extension cords.

    Signs of Wear and Tear to Look Out For

    Knowing how often to inspect your extension cords is vital, but knowing what to look for during these inspections is equally important. Here are some common signs of wear and tear that should raise red flags:

    1) Frayed or Damaged Insulation:

    • Visual Inspection: Check for any visible damage to the outer insulation of the cord, such as cuts, nicks, or exposed wires.
    • Tactile Inspection: Run your fingers along the cord to feel for any irregularities. If you notice any rough spots or exposed wires, it’s time to replace the cord.

    2) Cracked or Broken Plugs and Connectors:

    • Visual Inspection: Examine the plugs and connectors at both ends of the cord. If you see cracks or signs of damage, replace the cord immediately.
    • Wiggle Test: Gently wiggle the plug and connector to ensure they are securely attached. Loose connections can lead to sparks and overheating.

    3) Burn Marks or Scorching:

    • Visual Inspection: Inspect the entire cord length for any burn marks, scorching, or discoloration. These are clear indications of overheating and potential fire hazards.

    4) Knots, Tangles, or Twists:

    • Visual Inspection: Ensure the cord is free from knots, tangles, or twists. These can create pressure points, leading to insulation damage and increased risk of electrical faults.

    5) Exposed Wiring at Junctions:

    • Visual Inspection: Pay close attention to areas where the cord is connected to plugs, connectors, or junction boxes. Any exposed wiring in these areas is a sign of wear and should be addressed immediately.

    6) Bent or Pinched Cords:

    • Visual Inspection: Look for any areas where the cord has been bent or pinched, which can cause internal damage to the wires.

    7) Incompatibility with Appliances:

    • Functional Inspection: Ensure that the extension cord is rated for the appliances you intend to use it with. Using an extension cord with a lower capacity than your appliance requires can lead to overheating.

    8) Unusual Odors or Sounds:

    • Sensory Inspection: If you notice unusual odors, such as a burning smell, or hear crackling or popping sounds when using an extension cord, immediately unplug it and investigate the cause.

    It’s essential to address any of these issues promptly. If you discover any signs of wear and tear during your inspection, cease using the cord immediately and replace it with a new one. Failure to do so can result in dangerous electrical incidents.

    Proper Storage and Care for Extension Cords

    Inspecting extension cords is only one aspect of maintaining electrical safety. Proper storage and care can significantly extend the lifespan of your cords and reduce the risk of accidents. Here are some tips to keep your extension cords in excellent condition:

    1. Unplug When Not in Use:

    • Always unplug your extension cords when they are not in use. This conserves energy and prevents potential overheating if a faulty cord remains connected.

    2. Avoid Overloading:

    • Respect the load capacity of your extension cords. Do not overload them with too many appliances or devices, as this can lead to overheating and damage.

    3. Store Cords Tangle-Free:

    • Properly coil and store your extension cords in a dry and cool location. Avoid tightly winding them around your arm or hand, which can cause kinks and damage.

    4. Protect from Physical Damage:

    • Keep extension cords away from heavy machinery, sharp objects, and foot traffic to prevent physical damage.

    5. Use Cord Protectors:

    • Consider using cord protectors or covers in areas where cords are exposed to heavy traffic or potential crushing.

    6. Avoid Pinching:

    • Ensure that cords are not pinched between furniture, doors, or windows, as this can damage the insulation.

    7. Keep Away from Moisture:

    • Extension cords and moisture do not mix well. Keep them away from wet areas to prevent electrical hazards.

    8. Regularly Clean Cords:

    • Dust and debris can accumulate on cords over time. Periodically clean them with a dry cloth to prevent overheating.

    By following these storage and care guidelines, you can prolong the life of your extension cords and reduce the likelihood of accidents caused by wear and tear.

    In Conclusion

    Extension cords are often overlooked when it comes to electrical safety. But, by taking a proactive approach and regularly inspecting and maintaining them, you can protect yourself, your loved ones, and your property from potential electrical hazards. It’s important to adjust your inspection frequency based on the specific environment and usage of your extension cords, and always replace cords that show signs of wear and tear.

    Electrical safety should be a top priority in every home, workplace, or construction site. Following the advice outlined in this guide, you can enjoy the convenience of extension cords without compromising safety. Stay vigilant, stay safe, and let your extension cords serve as reliable power conduits for years.

  • How to Splice an Extension Cord: A DIY Guide for Safety-Conscious DIYers

    How to Splice an Extension Cord: A DIY Guide for Safety-Conscious DIYers

    Having the right tools and knowledge is essential for DIY and electrical repairs. Splicing an extension cord is a crucial skill every DIY enthusiast and electrician should have in their arsenal. Whether you need to extend the reach of your power source, repair a damaged cord, or customize your cord length, knowing how to splice an extension cord safely can be a valuable skill. This step-by-step guide will take you through the process, highlighting safety precautions and troubleshooting tips for common issues.

    Why Splice an Extension Cord?

    Before diving into the nitty-gritty of splicing an extension cord, let’s understand why it’s a handy skill. Extension cords are a versatile tool, but sometimes, they just need to be the right length for your needs. Splicing allows you to customize your cord to the required size, reducing clutter and potential tripping hazards in your workspace.

    Moreover, if your extension cord has suffered damage – maybe it got nicked by a lawnmower or chewed by a mischievous pet – you don’t have to throw it away. Splicing can save money by giving your damaged cord a second chance at life. It’s eco-friendly, too!

    Tools and Materials You’ll Need

    Before you start, gather the necessary tools and materials:

    Tools:

    1. Wire cutters/strippers
    2. Heat shrink tubing
    3. Soldering iron
    4. Solder
    5. Utility knife
    6. Electrical tape
    7. Screwdriver

    Materials:

    1. Extension cord with damaged ends (or a longer one to customize)
    2. Replacement male and female plugs (if necessary)
    3. Heat-resistant gloves
    4. Safety goggles
    5. Fireproof work surface

    Step-by-Step Guide on How To Splice an Extension Cord

    Now, let’s get our hands dirty – figuratively, of course – and splice that extension cord safely and effectively. Remember, safety comes first!

    Step 1: Safety First

    Before you start splicing, ensure your safety gear is in place. Put on heat-resistant gloves and safety goggles to protect yourself from potential hazards. You’ll also want to work on a fireproof surface to prevent accidents.

    Step 2: Cut the Cord

    Using wire cutters, cut the damaged part of the extension cord. Make sure to cut it clean and straight to ensure proper connections. If you’re customizing the length of your cord, cut it to your desired size.

    Step 3: Strip the Wires

    Using wire strippers, carefully strip about 1 inch of insulation from the ends of the wires. You should expose the copper wire beneath. Keep your extension cord separate and organized if it has more than two wires.

    Step 4: Prepping the Replacement Plug

    If you’re replacing the plug (male or female), follow the manufacturer’s instructions that came with the replacement plug. Typically, you’ll need to loosen screws to access the connection points.

    Step 5: Solder the Wires

    Now, it’s time to solder the wires. A soldering iron is used to melt solder, which securely bonds the wires. Ensure the wires are clean, then apply a small amount of solder to the exposed copper. It should flow smoothly over the wires.

    Step 6: Heat Shrink Tubing

    Slide a heat shrink tubing over each wire connection for added safety and insulation. This will help protect the connection from moisture and physical damage. Gently heat the tubing until it shrinks and forms a snug seal.

    Step 7: Electrical Tape

    Wrap each connection with electrical tape, providing an extra layer of protection and stability. Make sure there are no exposed wires.

    Step 8: Reassemble the Plug

    If you removed the plug earlier, reassemble it according to the manufacturer’s instructions. Ensure a snug fit and tighten any screws securely.

    Step 9: Test Your Splice

    Before using your newly spliced extension cord, test to ensure it works correctly. Plug it in and test the connected appliances or tools. If everything runs smoothly, congratulations – you’ve successfully spliced your extension cord!

    Troubleshooting Common Issues When You Splice an Extension Cord

    Splicing an extension cord can be straightforward, but sometimes problems arise. Here are some common issues and how to troubleshoot them:

    1. No Power:

    If you’ve followed the steps and there’s no power to your devices, first, check the connections. Ensure the wires are securely soldered and that there are no exposed wires. If everything looks good, your issue might be with the replacement plug. Double-check that you’ve assembled it correctly.

    2. Short Circuit:

    If your extension cord is causing a short circuit, it could be due to a loose connection or exposed wires. Inspect the cord for any signs of damage or exposed copper. If you find any, re-solder the connection and reapply heat shrink tubing and electrical tape.

    3. Overheating:

    An overheating cord can indicate excessive resistance in the connection, potentially due to insufficient soldering or damaged wires. Revisit your soldering job, ensuring it’s solid and secure.

    4. Sparks or Burning Smell:

    If you notice sparks or a burning smell, unplug the cord immediately. This can be a sign of a dangerous short circuit or faulty soldering. Carefully inspect the cord and make necessary repairs before using it again.

    Conclusion

    Splicing an extension cord is valuable for DIY enthusiasts and electricians. It allows you to customize cord lengths, repair damaged cords, and reduce waste. However, it’s crucial to follow the process, prioritizing safety throughout. Always use the right safety gear and double-check your connections to avoid electrical hazards.

    Remember, practice makes perfect. If you’re new to splicing, start with an old or damaged cord to hone your skills. With time and experience, you’ll become a pro at splicing extension cords, making your DIY projects smoother and more efficient.

    So, there you have it – a comprehensive guide on splicing an extension cord safely and effectively. Now it’s time to put your new skills to the test and enjoy the flexibility and cost savings that come with splicing your extension cords.

    If you have any questions or want to share your splicing experiences, please leave a comment below. We’re here to help and learn from one another in the vibrant community of DIYers and electricians.

    FAQ’s

    Q1: Is it safe to splice an extension cord myself?

    Answer: Splicing an extension cord can be safe if done correctly and with the right safety precautions. It’s essential to wear safety gear, follow the step-by-step guide, and double-check your connections to prevent electrical hazards.

    Q2: Can I splice an extension cord with more than two wires?

    Answer: You can splice an extension cord with more than two wires. Keep the wires organized and separated during the splicing process, following the same steps outlined in the guide.

    Q3: What should I do if my spliced extension cord isn’t working properly?

    Answer: If your spliced extension cord isn’t working, first check the connections to ensure they are secure and that there are no exposed wires. If you’ve ruled out connection issues, consider the replacement plug, as it might be assembled incorrectly.

    Q4: Can I splice an outdoor extension cord like an indoor one?

    Answer: Splicing is generally the same for indoor and outdoor extension cords. However, for outdoor use, use weatherproof connectors and heat shrink tubing to protect against moisture and environmental factors.

    Q5: Is there a limit to how many times I can splice an extension cord?

    Answer: While you can splice an extension cord multiple times, limiting the number of splices is best for safety and performance reasons. Excessive splicing can lead to increased resistance and potential overheating. If your cord has been spliced multiple times, consider replacing it entirely for safety.

  • How to Wire an Extension Cord: A DIY Guide for Safety and Convenience

    How to Wire an Extension Cord: A DIY Guide for Safety and Convenience

    Introduction

    Extension cords play a vital role in our electrical world. They act as a lifeline for our devices, appliances, and tools, especially when an outlet is not easily accessible. Whether you are an experienced DIYer, a homeowner with some DIY skills, or a professional electrician, it’s important to know how to wire an extension cord. This skill can save you money and help you maintain a safe electrical setup.

    In this guide, we’ll walk you through the process of wiring an extension cord step by step. We’ll emphasize safety measures, explain the different components of an extension cord, and provide tips and insights that will help you become a cord-wiring pro. So, grab your tools, put on your safety goggles, and let’s dive into the world of extension cords.

    What is an Extension Cord?

    Understanding the Basics of How to Wire an Extension Cord

    Before we dive into the nitty-gritty of wiring an extension cord, let’s start with the basics. An extension cord is a flexible electrical cable with a plug on one end and one or more sockets on the other. It’s a simple yet indispensable tool that allows you to extend the reach of your electrical devices beyond the reach of a power outlet. Extension cords come in various lengths, shapes, and sizes, making them versatile for a wide range of applications.

    The Anatomy of an Extension Cord

    To successfully wire or repair an extension cord, you need to understand its various components. Here’s what makes up a typical extension cord:

    1. Cord

    The cord is the long, flexible cable that extends from the plug to the socket(s). It’s the essential conduit for electrical power to travel from the source to your device. Cords come in different thicknesses, known as wire gauges, which affect their capacity to carry current. The thicker the cord, the more electrical load it can handle.

    2. Plug

    At one end of the cord, you’ll find the plug. This is what you insert into an electrical outlet. Plugs can vary based on their design and prong configuration. Make sure your plug matches the type of outlet you intend to use.

    3. Socket

    On the opposite end of the cord, you’ll have one or more sockets, also known as receptacles. These are where you plug in your devices. Sockets are available in different configurations to accommodate various types of plugs.

    4. Insulation

    The outer covering of the extension cord is typically made of rubber or plastic. This insulation is crucial for safety, as it prevents electrical exposure and protects the wires inside.

    Safety First: The Golden Rule of Cord Wiring

    Safety should always be your top priority when dealing with electricity. Before you even think about wiring or repairing an extension cord, make sure to follow these essential safety measures:

    1. Disconnect the Power: Never work on an extension cord while it’s connected to a live power source. Always unplug it from the wall or disconnect it from the power supply to ensure your safety.
    2. Inspect for Damage: Before you begin, thoroughly inspect the extension cord for any signs of wear and tear. Look for frayed wires, exposed conductors, or damaged plugs. If you find any, it’s best to replace the cord rather than attempting repairs.
    3. Appropriate Tools and Materials: Ensure you have the right tools and materials for the job. You’ll need wire strippers, electrical tape, a replacement plug if required, and a soldering iron. Using the correct equipment will help you achieve a safe and effective repair or wiring.

    How to Wire an Extension Cord: Step-by-Step

    Now that you’re equipped with the knowledge of extension cord components and safety measures, it’s time to learn how to wire or repair an extension cord. Here’s a step-by-step guide:

    Step 1: Cut and Strip the Cord

    If you’re repairing a damaged cord, start by cutting off the damaged section. Using wire strippers, carefully strip about an inch of insulation from the cut ends of the cord to expose the inner wires. Ensure the exposed wires are clean and free from frayed strands.

    Step 2: Prepare the Plug

    If you’re wiring a new cord or replacing a plug, prepare the plug by opening it up. You’ll usually find two or three terminals inside, each marked for the hot (black or red), neutral (white), and ground (green or bare) wires. Insert the cord through the plug’s cable clamp and make sure the wires are long enough to reach the terminals.

    Step 3: Connect the Wires

    Connect the wires to the corresponding terminals. The hot wire goes to the brass or gold-colored terminal, the neutral wire to the silver terminal, and the ground wire to the green or bare terminal. Tighten the terminal screws securely to ensure a good electrical connection.

    Step 4: Secure the Cable Clamp

    Secure the cable clamp once the wires are connected to hold the cord in place. This prevents the wires from being tugged or pulled loose, which could lead to dangerous exposure.

    Step 5: Close the Plug

    Close the plug’s casing and secure it with screws or clips. Make sure it’s properly sealed to protect the wires and connections from exposure.

    Step 6: Test the Cord

    Before putting the extension cord to use, test it to ensure it’s working correctly. Plug it into a known working outlet and check that your devices receive power without any issues.

    Maintenance and Safety Tips for How to Wire an Extension Cord

    1) Keeping Your Extension Cords Safe

    Now that you know how to wire or repair an extension cord, it’s essential to keep your cords in good condition. Here are some maintenance and safety tips:

    2) Regular Inspections

    Periodically inspect your extension cords for damage, especially if they are used outdoors or in challenging environments. Promptly replace any damaged cords.

    3) Proper Storage

    Store your extension cords coiled or hung on hooks to prevent kinks and tangles. This also prolongs the cord’s life and makes it easier to use.

    4) Don’t Overload

    Every extension cord has a maximum capacity. Never exceed this capacity by plugging in too many devices. Overloading can lead to overheating and fire hazards.

    5) Unplug When Not in Use

    When your devices are not in use, unplug them from the extension cord. This saves energy and reduces the risk of electrical issues.

    6) Invest in Quality Cords

    High-quality extension cords are built to last and provide better protection. It’s worth investing in durable cords for safety and longevity.

    Conclusion

    Wiring an extension cord may seem like a daunting task, but with the right knowledge and safety measures, it becomes a manageable DIY project. Whether you’re a DIY enthusiast, a handy homeowner, or an electrician, this guide has equipped you with the skills needed to create or repair extension cords. Always prioritize safety, understand the components of your extension cords, and follow the step-by-step instructions provided.

    Extension cords are the unsung heroes of electrical convenience. They’re the extra mile that your power needs to reach. So, with your newfound knowledge, you can keep the electricity flowing, whether it’s for your power tools, holiday lights, or any other electrical device. Happy wiring!

    Frequently Asked Questions (FAQs)

    Q1: Can I repair an extension cord that has a damaged plug or frayed wires myself, or should I seek professional help?

    A1: You can repair a damaged extension cord yourself if you have the necessary tools and follow safety guidelines. However, if you’re unsure about your abilities or if the damage is extensive, it’s best to consult a professional electrician for safe and reliable repairs.

    Q2: What should I do if my extension cord gets wet or is exposed to the elements?

    A2: Extension cords should not be used outdoors or in wet conditions unless they are designed for it. If your cord gets wet, unplug it immediately and let it dry thoroughly before using it again. For outdoor use, invest in extension cords with a “waterproof” or “outdoor” rating.

    Q3: Can I daisy-chain multiple extension cords to reach a distant outlet?

    A3: It’s generally not recommended to use daisy-chain extension cords. It can lead to overloading, overheating, and increased fire risks. Instead, use a single, longer cord that’s rated for the intended load, or consider installing additional outlets where needed.

    Q4: How can I determine my extension cord’s capacity or amperage rating?

    A4: The amperage rating of an extension cord is often labeled on the cord or its packaging. Look for a number followed by “A” (e.g., 15A) to find the amperage rating. Ensure the rating matches the load you intend to connect to the cord.

    Q5: What’s the difference between 2-prong and 3-prong plugs on extension cords, and when should I use each type?

    A5: A 2-prong plug has two pins for hot and neutral wires, while a 3-prong plug has an additional ground pin. For safety reasons, always use 3-prong extension cords when possible, especially for grounded appliances and in areas where electrical grounding is required. A 2-prong cord should only be used with double-insulated, non-grounded devices in suitable environments.

  • What Is the Best Extension Cord for a Refrigerator?

    What Is the Best Extension Cord for a Refrigerator?

    Wondering what Is the best extension cord for a refrigerator? Refrigerators are indispensable appliances in modern households, ensuring the preservation of perishable goods and maintaining a constant temperature for optimal freshness. Yet, in the pursuit of convenience, many overlook the critical aspect of choosing the right extension cord to power these essential devices. In this guide, we delve into the realm of extension cords, highlighting their importance, safety considerations, power requirements, and top recommendations.

    Understanding the Significance of a Reliable Extension Cord

    In the realm of electrical appliances and tools, the significance of a reliable extension cord cannot be overstated. Whether you’re a seasoned DIY enthusiast or a professional tradesperson, having the right extension cord can make a world of difference. In terms of safety, efficiency, and performance.

    A refrigerator extension cord serves as a crucial link between your appliance and the power outlet. While it may seem like a trivial accessory, selecting the appropriate cord can significantly impact the efficiency and safety of your refrigerator’s operation.

    Safety First: Why Choosing the Right Cord Matters

    Using an improper extension cord for your refrigerator can lead to various hazards, including overheating, electrical fires, or even damage to your appliance. Opting for a cord with inadequate gauge or length can result in voltage drops. Compromising the refrigerator’s performance and potentially causing irreparable damage.

    Power Requirements: Matching the Cord to Your Refrigerator

    Refrigerators, especially those with advanced features such as ice makers or digital controls, demand a stable and consistent power supply. It’s crucial to select an extension cord capable of handling the electrical load required by your appliance without voltage drops or fluctuations. Refer to your refrigerator’s user manual or consult with a qualified electrician to determine the appropriate cord specifications.

    Top Recommendations for Refrigerator Extension Cords

    When it comes to selecting the best refrigerator cord, prioritizing quality and safety is paramount. Look for cords with heavy-duty construction, adequate gauge size (typically 12 or 14 gauge for refrigerators), and UL certification for optimal performance and peace of mind. Here are some top recommendations to consider:

    • Certified Heavy-Duty Extension Cord: Choose a cord specifically designed for heavy-duty applications, ensuring durability and reliability even under prolonged use.
    • Shorter Length, Higher Efficiency: Opt for a shorter cord length to minimize voltage drops and maintain consistent power delivery to your refrigerator.
    • UL Listed Extension Cord: Look for cords with UL certification, indicating compliance with rigorous safety standards and regulations.
    • Gauge Size Matters: Select a cord with a gauge size suitable for refrigerator use, typically 12 or 14 gauge for adequate power transmission and safety.
    • Weather-Resistant Features: If your refrigerator is placed in an outdoor or damp environment, consider an extension cord with weather-resistant features to prevent damage from moisture or exposure to the elements.

    These features help safeguard your refrigerator against power surges, voltage spikes, and electrical faults. Investing in a cord with these protections can provide peace of mind and prolong the lifespan of your appliance.

    Choosing the best extension cord for your refrigerator is not a decision to be taken lightly. By prioritizing safety, power requirements, and quality, you can ensure optimal performance and longevity for your appliance. Invest in a reliable extension cord that meets the specific needs of your refrigerator, and enjoy peace of mind knowing that your appliance is powered safely and efficiently.

  • How to Roll Up an Extension Cord Like a Pro

    How to Roll Up an Extension Cord Like a Pro

    Extension cords are handy for homeowners, DIY enthusiasts, and electricians. They give us the extra reach to power our tools, appliances, and devices indoors and outdoors. However, if you’ve ever struggled with a tangled, messy extension cord, you know the frustration it can bring. The good news is that there’s a right way to roll up an extension cord, and it’s not just about tidiness—it’s also about safety and efficiency.

    This step-by-step guide will show you how to roll up an extension cord like a pro. We’ll cover the benefits of proper cord storage, mention essential safety precautions, and suggest clever storage solutions to keep your cords in check. Whether you’re a DIY enthusiast, a homeowner, or an electrician, mastering the art of cord rolling will make your life easier and safer.

    The Art of Rolling Up an Extension Cord

    Rolling up an extension cord may seem simple, but doing it correctly can save you time and hassle in the long run. Here’s how to master the art of rolling up an extension cord.

    Benefits of Proper Cord Storage

    Before we dive into the “how-to,” let’s discuss why storing your extension cords is essential.

    1. Prevents Tangles and Knots

    One of the most significant advantages of correctly rolling up an extension cord is that it prevents tangles and knots. When you need to use your extension cord, you won’t waste time wrestling with a tangled mess. Instead, you’ll have a neat, ready-to-use cord at your disposal.

    2. Extends Cord Lifespan

    Proper storage can also extend the lifespan of your extension cords. When cords are coiled haphazardly, they can become kinked or damaged over time. This can lead to shorts, exposed wires, and, in some cases, electrical hazards. Rolling them up correctly will protect the cord’s integrity, saving you money in the long run.

    3. Ensures Safety

    Safety should always be a top priority when working with electricity. How you roll up your extension cords can impact safety in several ways. If a cord is damaged due to improper storage, it can pose a risk of electrical shock or fire. Additionally, tripping over tangled cords can result in accidents and injuries. Proper storage minimizes these risks.

    4. Saves Space

    Neatly rolled extension cords take up less space. Whether you’re storing them in your workshop, garage, or closet, efficient cord storage means you’ll have more room for other tools and equipment.

    How to Roll Up an Extension Cord Like a Pro

    Now, let’s get into the nitty-gritty of rolling up an extension cord. Follow these simple steps to ensure your cords remain organized and hassle-free.

    Step 1: Unplug the Cord

    Before you start rolling, ensure that the extension cord is unplugged. This is a crucial safety precaution, as rolling up a live cord can be dangerous.

    Step 2: Straighten the Cord

    Lay the extension cord out on a flat, clean surface. Hold one end and walk along its length, straightening it out as you go. This step will make the rolling process much easier.

    Step 3: Create a Loop

    With the cord straightened, create a loop at one end. Hold the loop with one hand, and make sure it’s large enough to grasp comfortably.

    Step 4: Start Coiling

    Now, begin coiling the cord in a clockwise direction. Keep your loops neat and close together, ensuring no kinks or twists. As you coil, maintain tension to keep the cord snug.

    Step 5: Secure with a Twist Tie or Velcro Strap

    Once you’ve reached the end of the cord, secure it with a twist tie, Velcro strap, or any other cord management tool you choose. This prevents the coil from unwinding and keeps it tidy.

    Step 6: Hang or Store

    You have a few storage options with your extension cord neatly coiled and secured. You can hang it on a cord reel or a wall hook or simply place it in a container or bin for cord storage. Choose the method that suits your workspace and needs best.

    Safety Precautions for How to Roll Up an Extension Cord

    Rolling up an extension cord is a straightforward process, but it’s essential always to consider safety. Here are some safety precautions to keep in mind:

    • Inspect Your Cord: Before coiling, take a quick look at your extension cord. If you notice any damage, exposed wires, or fraying, it’s essential to repair or replace the cord before use. Using a damaged cord can be dangerous.
    • Never Overload the Cord: Extension cords have a maximum amperage rating, so be sure not to overload them. Check the cord’s label for this information and ensure that the devices you’re plugging in don’t exceed the cord’s capacity.
    • Unplug Before Rolling: Always unplug the cord before rolling it up. Rolling a live cord can lead to accidents or damage.
    • Store in a Dry Location: When not in use, store your extension cords in a dry location. Moisture can damage the cord and pose electrical hazards.
    • Avoid Sharp Bends and Kinks: Avoid sharp bends or kinks in the cord when rolling. These can weaken the cord’s insulation and lead to potential issues.
    • Check for Heat Buildup: After using an extension cord, checking if it heated up during operation is a good practice. Excessive heat can indicate an overload or a faulty connection. If you notice heat buildup, discontinue use and inspect the cord.

    For more detailed safety guidelines and tips, consider reading Electrical Safety Tips When Using Extension Cords, which provides comprehensive safety advice and precautions to enhance your safety when using extension cords.

    Clever Cord Storage Solutions for How to Roll Up an Extension Cord

    Properly coiled extension cords are the first step to a neat workspace, but where and how you store them is equally important. Here are some storage solutions to keep your cords organized and accessible.

    1. Cord Reels

    Cord reels are an excellent way to keep your extension cords organized. They come in various sizes and can be mounted on walls or placed on the ground. Cord reels make it easy to unroll and roll up your cord as needed.

    1. Cord Hooks

    Install cord hooks on your workshop or garage walls to hang your extension cords. This method not only keeps your cords off the floor but also allows you to see them at a glance.

    1. Cord Containers

    Consider using dedicated containers or bins for cord storage. These containers keep your cords neatly coiled and protected from dust and moisture. You can label the containers for easy identification.

    1. Cord Wraps

    Cord wraps, often made of Velcro, are a simple and affordable solution for keeping cords organized. You can wrap them around your coiled cords to keep them secure.

    1. PVC Cord Hangers

    DIY enthusiasts can create their cord hangers using PVC pipes. Cut the pipe into sections and drill them into the wall. Then, place your coiled extension cords through the pipes to keep them organized.

    Conclusion

    Rolling up an extension cord correctly may seem like a small task, but it can make a big difference in your workspace’s organization, safety, and efficiency. By preventing tangles, extending the cord’s lifespan, and using proper storage solutions, you’ll save time money, and ensure a safer environment.

    So, the next time you finish a DIY project, remember to unplug, straighten, coil, and secure your extension cord properly. Your future self will thank you for the hassle-free, tangle-free power source.

    With these simple steps and safety precautions, you can become a pro at rolling up extension cords, making your projects smoother and your workspace tidier. Say goodbye to the frustration of tangled cords and hello to a more organized and efficient work environment. Happy rolling!

    FAQs

    Q1. Can I roll up multiple extension cords together?

    It’s generally not recommended to roll up multiple extension cords together. Each cord should be coiled separately to prevent tangles and ensure proper storage.

    Q2. How do I repair a damaged extension cord?

    If you notice damage or exposed wires on your extension cord, it’s best to repair or replace it. You can repair minor damage with electrical tape, but for more significant issues, consult a professional or replace the cord.

    Q3. Can I use the same rolling technique for all types of extension cords?

    The rolling technique described in this guide is suitable for most standard extension cords. However, extremely long or heavy-duty cords may require different storage solutions, such as cord reels.

    Q4. What’s the best way to label my cord containers for easy identification?

    Labeling your cord containers with the cord’s length or purpose (e.g., “Outdoor Christmas Lights”) is a practical way to ensure you can quickly find the right cord when needed.

    Q5. How often should I inspect my extension cords for damage?

    It’s a good practice to inspect your extension cords before each use. Regular inspections help you catch and address any issues early, enhancing safety.

    Additional Resources on How to Roll Up an Extension Cord

    For more tips on cord management, DIY projects, and home organization, check out the following resources:

    Remember, a well-organized workspace not only makes your life easier but also promotes safety and efficiency. Happy rolling, and keep your workspace tangle-free!